Tuesday, November 17, 2015

Banana Bread...Unrefined, But Still Classy as Hell

Once those bananas get a few too many dark spots, I know they're all mine.  Sometimes I make those three ingredient pancakes.  One smashed banana, one egg, two tablespoons flour are all you need to make a healthier hot cake.  There's no leavening, no sugar, none needed.  I use coconut oil to grease the pan and that makes it even more delicious.  Top with a little maple syrup or low sugar blueberry jelly from the Farmer's Market or sliced fresh fruit.


Anyhoo, today I have four lonely, nasty looking, sugar filled pods I'm about to bust open to make this week's school snacks and after dinner dessert.  The bowl is fitting.


Past your prime potassium posse

WHOLE WHEAT BANANA NUT BREAD
Ingredients:
1 stick of butter
1 cup of coconut palm sugar
4 bananas, mashed with a fork
2 eggs, lightly beaten
1 1/2 cups of whole wheat flour
1 teaspoon of baking soda
1 teaspoon cinnamon
1/2 teaspoon salt
1 teaspoon vanilla extract
1 1/2 cups chopped walnuts

Directions:
Preheat oven to 350 degrees.  Cream the butter and sugar.


Then add the mashed bananas and eggs.


Next, in a separate bowl, combine the flour, soda, salt, and cinnamon.  Stir to combine.  Add this to the creamed mixture.  Mix just until combined.  Stir in vanilla and chopped walnuts.


Pour mixture into a greased loaf pan.  Bake for 1 hour at 350 degrees. Test with toothpick to make sure center is set.  Cool slightly then remove from loaf pan and place onto a cooling rack.  


 Now that's what I'm talking about


Friday, November 13, 2015

Takin' it Back to the Old School

Because it's Friday and we like to celebrate with chocolate, peppermint sandwich cookies.  


The kids were asking to make cookies this week.  We make the same chocolate chip, peanut butter, oatmeal cookies all the time.  They're our favorite.  So I thought they might have some fun looking through this old timer....


Then my oldest found them.  Sandwich cookies that I'd never have attempted whenever I first acquired this book.  The dough comes together very fast but you do have to chill it for several hours or overnight.  I stuck mine in the freezer for a couple hours.


{insert yule log joke}


Here's the original recipe.  I subbed in 1/4 cup of coconut oil for 1/4 cup of shortening and I used 1/2 cup of coconut palm sugar instead of regular sugar.  I couldn't help it, it's 2015!!!


 My helper


Triple stuffing these suckas!


These were fun to make and yeah, they're not going to last very long.  

Wednesday, September 30, 2015

Homemade Pita Bread

The only thing scary about making pita bread is how hot you have to get your oven.  Although there's white flour in the recipe, this bread is so versatile, preservative free and delicious.  It's easy to store and freeze.  It's a weekend project that will save you some time planning dinner during the busy work week.  The kids get so excited when they see I'm about to make pita bread.


Pita Bread
Easy recipe but it takes about 3 hours with having to wait for the dough to rise

Ingredients:
2 1/2 cups warm water, about 110 degrees
1 teaspoon of dry yeast
2 cups of whole wheat flour
4 cups of unbleached, all purpose flour
1 Tablespoon of olive oil
1 Tablespoon of salt

Directions:
Preheat oven to 500 degrees.  In a huge mixing bowl, mix the yeast into the warm water.  Add the whole wheat flour and one cup of white flour.  Mix well with a spoon for one minute then set aside for about 20 minutes.  Next, add the salt, oil and one cup of flour at a time while you mix.  When the dough becomes too difficult to stir, turn it out onto a floured surface and knead for about 8 minutes.  The dough should be sticky and become smooth.  Then return the dough to an oiled bowl, cover, and allow to rest for about 1 1/2 hours until it's doubled in size.  Meanwhile, make aluminum foil squares which we'll use to bake the dough.  Take a piece of foil and fold over each side 1/2 inch to make a small 'tray' to bake the dough. Make about six of these:


Save the foil trays for next time!


This dough should make at least 16 pitas, depending on the size.  You can choose to divide the dough up into smaller pieces and roll into balls or pull apart golf ball sized amounts.  Roll the dough on a floured surface and then place the 1/4 inch thick dough onto the foil.  I usually place three foils at a time directly on the oven rack for about 3 minutes.  It's better to under cook than over cook because the leftovers can be cooled, frozen and then reheated in the toaster oven on another day.  Using tongs and an oven mit, carefully remove each foil from the oven racks.  Turn the foil upside down to remove the pita onto a long piece of foil, stacking them as you go.  Bring an end of the foil up over the bread to allow the steam to continue cooking the bread.  Repeat the process.

I usually make this bread over the weekend and our first meal with it is almost always a scrumptious Mediterranean spread.  The following night we'll do 'make your own pizzas.'


Oh, and look!  These pizza toppings look a lot like what I'll use for Taco Tuesday the next night!  Chop once, use twice!  


If there are any leftovers after all that, stack the pitas, wrap in plastic wrap and then foil.  These can be stored in the freezer.


Thursday, September 17, 2015

School Snacks

It becomes a battle when the kiddos see what others eat for lunch and snacks and what I  prefer to pack for them.  It'd be easy to occasionally include a cookie for dessert if they wouldn't bring back a half eaten sandwich and untouched fruit and carrot sticks because "they ran out of time."

Supposedly, the school lunch program has made nutritional improvements but they are still selling chocolate and strawberry milk and offering ice cream for an additional cost in elementary school. Of course the kids are going to buy ice cream if it's available.  I have the ability to log into a website and see what my children purchased for lunch but I have no idea if they ate any of it.

The kids choose two days per week to buy a school lunch, while I encourage them to eat whatever vegetables are offered.  I think that's a pretty good deal for a 4th and 1st grader.

It's not like I deprive them of chips and sweets but I think it's so important to learn the value of whole food and the benefits of staying away from processed foods as much as possible.

Food manufacturers' goal is to make money.  That's it.  They want their product to look and taste delicious so consumers keep coming back for more.  It's all about the benjamins, baby.  We have to be accountable and responsible for our own health.  There are more advertisements, conveniences, and choices in America than anywhere else in the world.  We have all been subjected to images that influence our choices and it's happening to our children too.    

There still aren't daily percentages for the amount of sugar on food labels.  Gee, I wonder why? Could it be because most people exceed the recommended limit of sugar regularly?  The World Health Organization lowered the daily recommended amount of sugar to 25 grams per day, which is about 6 teaspoons (http://www.who.int/mediacentre/news/releases/2015/sugar-guideline/en/.) Processed food has sugar disguised as many different words which the average non-nutritionist person would hardly recognize.  Why would anyone be surprised over the childhood obesity rate or the obesity rate in the U.S. in general?

How are these family food battles handled?  Well, there's this one little word I have to use every day, sometimes hundreds of times a day, and that would be the word 'no.'  It's not easy, but it's necessary.

Here is an after school or lunch box snack I feel really good about.  I've made numerous attempts in making successful granola bars, each ending up too dry, not really tasty and falling apart into just plain granola.  This recipe is amazing.  I'm even a little reluctant to share because I'm sure I could make a boat load to sell at the Farmer's Market (but am I really gonna do that?)  


Homemade Granola Bars
Ingredients:
4 cups of quick cooking oats
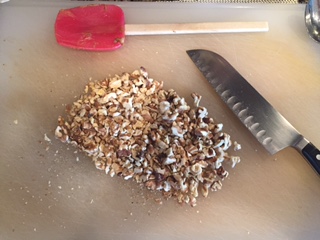
2 cups whole almonds
1 cup sweetened coconut
1 cup dried cranberries, diced
1/2 cup wheat germ
1/2 cup sunflower seeds
1/4 cup flax seed
2 Tablespoons coconut oil
2 Tablespoons maple syrup
1/4 cup honey
1/4 cup water
1 teaspoon cinnamon
2 teaspoon vanilla
Optional:  1-2 cups of chocolate chips

Directions:
Preheat the oven to 375 degrees.  Spread the oats, almonds and coconut onto a cookie sheet and toast in the oven for about 15 minutes.


Meanwhile, combine the rest of the dry ingredients into a very large mixing bowl.  In a medium saucepan, bring the oil, syrup, honey, water and cinnamon to a simmer.


Remove from heat and stir in the vanilla.  Remove the ingredients from the oven and add to the mixing bowl. Mix all the dry ingredients then pour the ingredients from the saucepan into the mixing bowl.  Mix well until everything is coated.  Place enough parchment paper into an 8 x 8 baking pan to hang over the edges.  This will allow the granola to be easily removed from the pan in order to cut into bars.  Pour the granola into the baking pan over the paper.  Cover with an additional sheet of parchment paper and press firmly into the pan.


Allow to set in the refrigerator for at least an hour.  Once it's set, carefully pull the bottom sheet of parchment paper to remove the entire snack, then cut into single serve squares.  At this point you may melt chocolate chips in 30 second intervals in the microwave until smooth and drizzle chocolate over the bars.  Store in an airtight container in the refrigerator.

I always double this recipe to fit my cookie sheet!  They're that good.

Tuesday, September 15, 2015

A Healthy Grab and Go


Need something healthy and quick to get everyone out the door on time?  These mini frittatas can be made over the weekend and refrigerated for a quick snack or meal during the week.  They're packed with protein to help you make it to lunch and they won't leave a trail of crumbs like some prepackaged breakfast foods.  They are good at room temperature but I like to reheat them in the microwave for about 10 seconds. 
Like with most cooking, add whatever vegetables you have.  These can be made with diced ham or bacon.  Be sure to dice everything very small because it's going into a small space to cook. 


This recipe calls for lemon zest which can obviously be omitted.  However, zest is amazing with eggs, actually, it's amazing in almost everything.  Citrus is great to have on hand if you do a lot of cooking because it helps add a bright, fresh flavor.  Zest and fresh juice can be used for dressings, sauces, desserts, in potatoes, rice, quinoa, soup, salsa, casseroles, cookies and more.  I buy the big bag of lemons to save money. 

MINI FRITTATAS
Makes 24
Prep and cook time: 40 minutes

Ingredients:
4 large eggs, beaten
1/4 milk
1/4 pound breakfast sausage, crumbled
1 medium onion, diced
1/2 bell pepper, diced
1/4 cup grated potato or sweet potato
1/4 cup button mushrooms, diced
1/2 cup grated cheddar cheese
1 lemon, zested

Directions:

Preheat oven to 350 degrees
Spray a mini muffin tin with nonstick cooking spray

Brown the sausage.  Add all of the vegetables to the sausage  and cook for about 7 minutes until the vegetables get soft.  Take off the heat and allow to cool.  Stir lemon zest into the cooled meat and vegetable mixture.


Add the milk to the beaten eggs, then add that to the meat/vegetable mixture.  I use a cookie scoop to help fill the muffin tin.  This can also be done using a pouring cup and spoon.  Top with cheese,  place in oven, bake for 8-10 minutes.  To remove the frittatas, gently run a butter knife around the edges to help pop them out.  Cool completely before wrapping and refrigerating.  These will also get you to church on time.  

Saturday, February 14, 2015


How do I Love Thee?  Let me Count the Ways....Chocolate.

Just a temporary format change and special feature for Lexi's on this sweet day.

Flowers, cards and chocolates make great Valentine's gifts but homemade gifts show a little more creativity while taking the time to let that special someone know how much you care.  This dessert is found on many great menus from casual to fine dining.  It's rarely cheap to order but surprisingly easy to make at home.  With a little planning and a short grocery list, this will surely impress the Love in your life!
One of the best gifts a person can give another, these days, is their time and attention.  People are working harder and having the ability to always be 'plugged in' blurs the lines between on and off duty.  If a person isn't actually earning money or talking business, the cellular phone has become a primary source of entertainment.  Though I'd never want my ability to Google anything at any time taken away, I sometimes have to remind myself to be in the moment with my family.  Many of these moments take place right in the kitchen. 

Valentine's Day may be a celebration of love and caring for some or annoying and dreaded by others who may be feeling lonely.  Let it be a reminder for everyone, to find love, in moments, every day, throughout the year.  As far as the cake goes, maybe limit that to very special occasions.   

Chocolate Lava Cake
Serves 4
Prep and cook time:  30 min.

Ingredients:

4 ounces of semi-sweet chocolate (find good chocolate in the baking aisle, sold in blocks or bars)
1 stick of butter which is  1/2 cup
1 cup powdered sugar
2 whole eggs
2 egg yolks
6 Tablespoons flour
1 teaspoon vanilla extract

Optional: 1 Tablespoon orange liqueur

Directions:

Heat oven to 425 degrees.  Butter or spray 4 custard cups.  Place the chocolate and butter in a small, microwave safe bowl.  Melt the chocolate and butter in the microwave, on high, for about a minute.  Stir with a whisk after 30 seconds.  Melt completely.  Stir in the sugar.  Stir in the whole eggs and yolks.  Stir in the flour.  Stir in vanilla and liqueur, if using.
Divide batter between the 4 custard cups and place cups onto a cookie sheet.  Bake for 13 minutes.  The side of the cakes should be set and slightly pulled away from the cup.   The middle with either be very soft or even sunken.  Remove from oven and allow to rest for 1 minute.  Run a knife along the sides of the cups and carefully invert onto a serving plate.  The custard cup will still be hot!

Top with whipped cream and fresh berries or vanilla bean ice cream.  Take a selfie with your sweetie and enjoy!

Wednesday, January 7, 2015

Everything is Awesome!

Lego Movie influenced, each week we celebrate Taco Tuesday, resulting in our usual eating out on Friday night at a Mexican restaurant to fall by the wayside.  I'm a little tired of tacos, as good as they are, but heaven forbid we miss a stuffed tortilla Tuesday night because the kids will have a total conniption.  They wouldn't mind eating Mexican food twice a week, but the youngest one only eats a cheese filled tortilla anyway, so I really have to switch things up for him the rest of the week with his other favorite foods like grilled cheese, cheese and crackers, grated cheese in a pile on his plate and string cheese (Napoleon sigh.)

My grocery store sells these.  


Only five ingredients!  Tortillas are the devil.  Take a look at the amazingly long list of ingredients on any tortilla package and you'll find lots of unpronounceable words.  Those delicious flat circles sit on the shelf for a while, needing to not mold and those preservatives prevent that.  I started making my own tortillas but couldn't seem to get the texture right.  I figure it's because I wasn't using lard.  I haven't seen that since visiting my great grandma's house in the early 80's.  Who still buys that?


Cook these bad boys up in a screaming hot pan, 30 seconds for each side.  They are delicious.  I always make extra, wrap and refrigerate for lunchboxes the next day.  They can be warmed in the microwave for about 20 seconds.  Once I fill and roll them, I'll wrap them in plastic to keep them tight until lunch time.  The kids love Wednesday's leftover taco lunches and I don't have to wonder what 's for lunch that day, every....single...........week.